4 Creative Crow Pose Variations: Take Your Bakasana to the Next Level
Unlock new levels of strength and balance. Learn 4 creative Crow Pose (Bakasana) variations, from Side Crow to Crane, with this comprehensive yoga guide for intermediate practitioners.
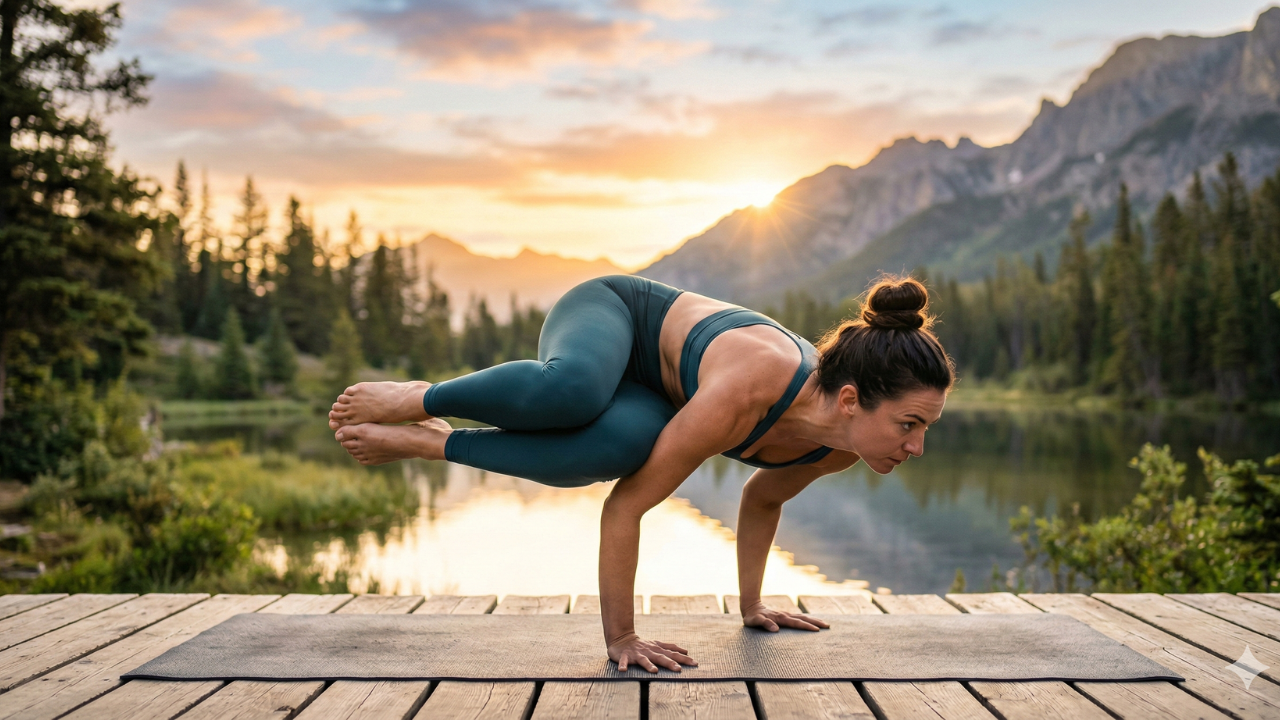
Table of Contents
Introduction
The Crow Pose or Bakasana in Sanskrit, is often a yogi’s first introduction to the world of arm balances. It is that magical moment where you realize that through a combination of core engagement, focus and a bit of courage, you can actually fly. But once you have mastered the standard version, where do you go from there?
Mastering the foundation of the crow pose is just the beginning. The beauty of yoga lies in its infinite progression. By exploring variations, you do not just “show off” a new trick, you challenge your neuro muscular pathways, deepen your core stability and build the wrist and shoulder strength required for even more advanced inversions like handstands.
In this guide, we will dive into four creative variations that will challenge your perspective and elevate your practice. Whether you are looking to add a twist or find more height, these transitions will help you take your Bakasana to the next level.
The Foundation: Important Points Before You Fly
1. The Power of the "Shelf"
In a standard crow pose, your triceps act as a shelf for your knees. As you move into variations, this shelf might shift or disappear entirely.
Ensure your chaturanga arms are strong and your elbows stay hugged into your midline to prevent “winging” out, which puts unnecessary strain on the rotator cuffs.
2. Gaze and Focus (Drishti)
In yoga, where the eyes go, the body follows. If you look down at the floor, you are more likely to tumble forward. Always keep your gaze slightly ahead of your fingertips. This shifts your center of gravity forward, allowing your hips to lift higher.
3. Core Connection (Mula Bandha)
The crow pose is not just about arm strength, it is a deep abdominal contraction. Think about pulling your navel toward your spine and lifting your pelvic floor. This “lift” makes your body feel lighter, making transitions between variations much smoother.
4 Creative Crow Pose Variations
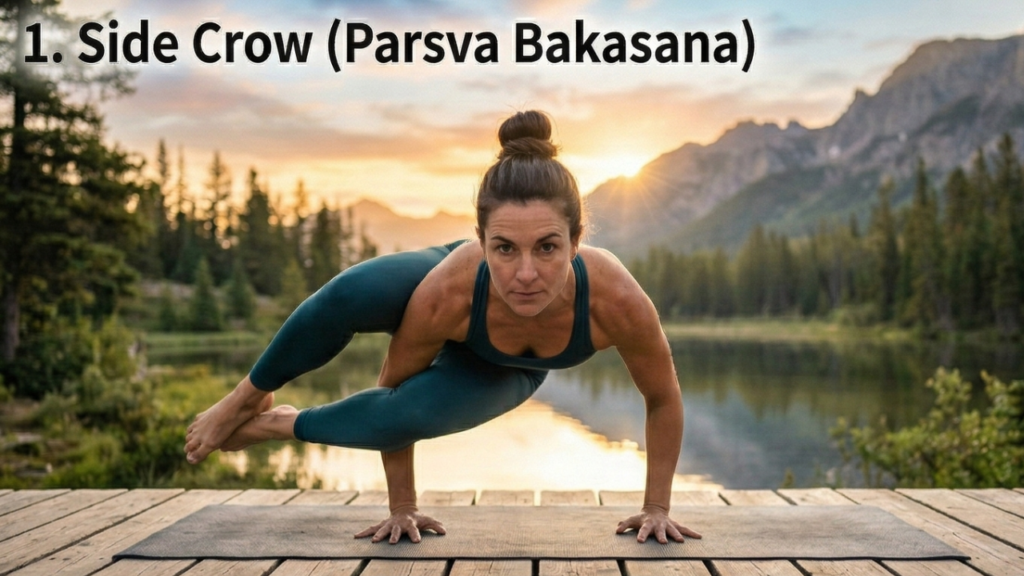
1. Side Crow Pose (Parsva Bakasana)
Side Crow is often the first variation yogis attempt. It introduces a deep spinal twist into the arm balance, targeting the obliques and improving spinal mobility.
How to do it: Start in a chair pose or a low squat with your feet together. Twist your torso to the right, placing your left outer arm against your right outer thigh. Plant your hands shoulder width apart. Lean forward, shifting your weight onto your arms until your feet lift.
Pro Tip: For more stability, you can rest your hip on one elbow and your knee on the other, but the “true” version involves balancing your entire weight on just one arm’s connection point.
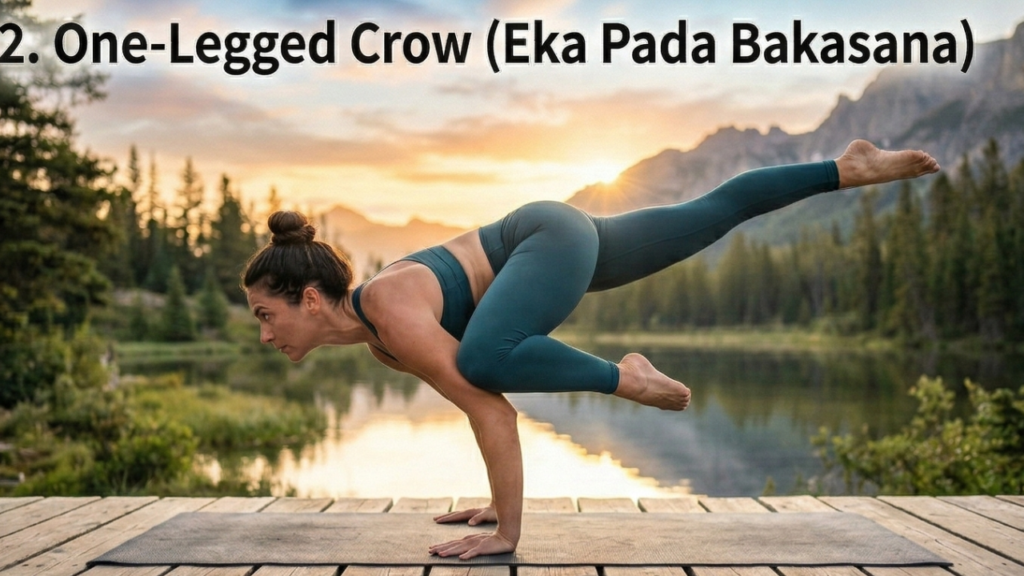
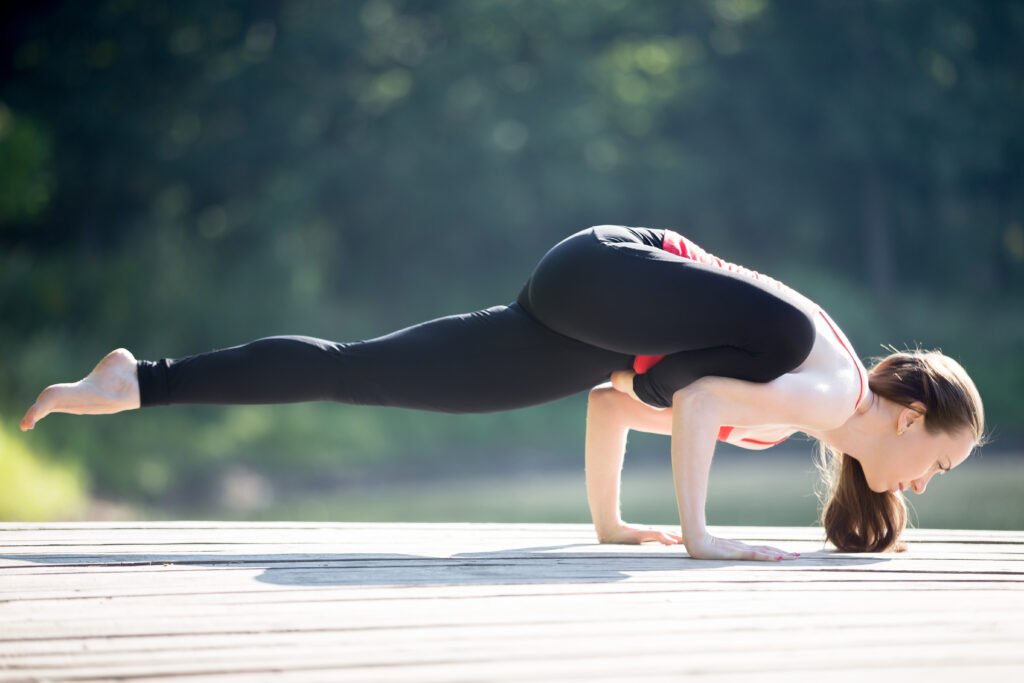
2. One Legged Crow Pose (Eka Pada Bakasana)
This variation adds an element of asymmetrical balance and intense core work. It requires you to stay centered while one leg extends toward the sky.
How to do it: Find your steady crow pose first. Once balanced, shift your weight slightly more into one side and tuck one knee tighter into your armpit. Slowly begin to extend the other leg back and up, keeping the toes pointed and the inner thigh engaged.
Pro Tip: Keep the floating leg active! Squeezing the glute and reaching through the toes will actually make the leg feel lighter.
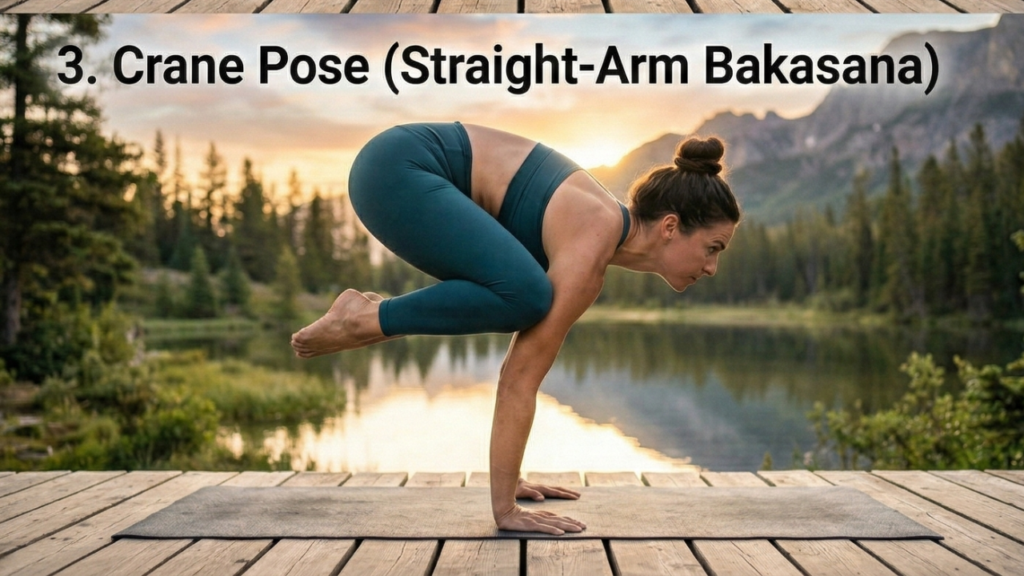
3. Crane Crow Pose (Straight Arm Bakasana)
While many people use “Crow” and “Crane” interchangeably, they are technically different. In Crow Pose, the arms are bent. In Crane Pose, the arms are fully straightened, requiring massive shoulder and protraction strength.
How to do it: From a standard crow, begin to push the floor away as hard as you can. Aim to bring your knees as high into your armpits as possible. Slowly straighten your elbows while keeping your knees locked into the triceps.
Pro Tip: Imagine you are trying to do a “cat pose” in your upper back (rounding the shoulder blades) to create the space needed for the straight arm lift.
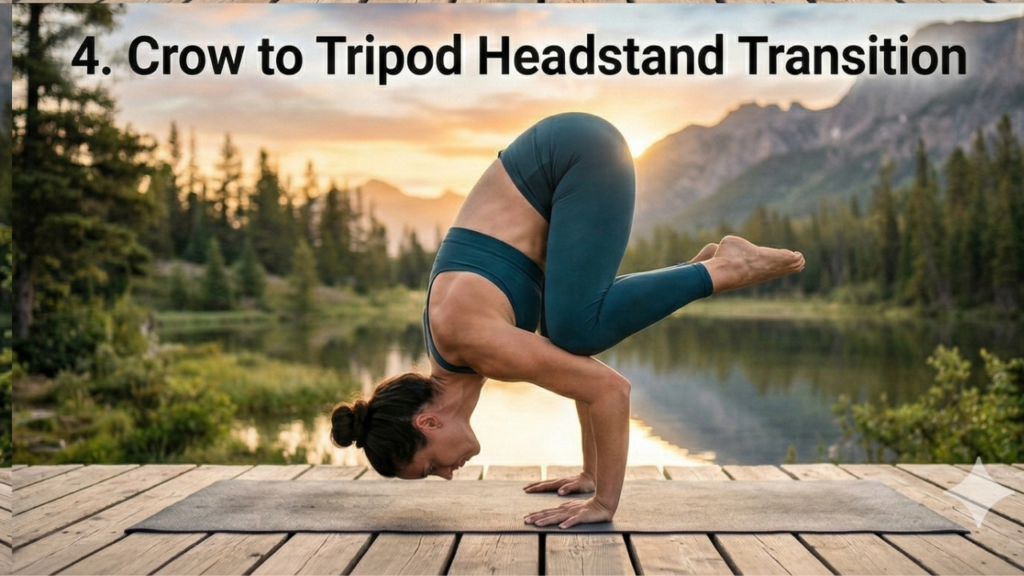
4. Crow Pose to Tripod Headstand Transition
This is a dynamic flow that tests your control and transitions. It turns a static hold into a fluid movement.
How to do it: From your crow pose, slowly and mindfully lower the crown of your head to the mat, forming a tripod shape with your hands. As your head touches down, shift your hips over your shoulders and extend your legs straight up into a Headstand (Sirsasana II).
Pro Tip: The “slow motion” control is what builds the strength. Avoid “crashing” onto your head, use your core to lower down like a feather.
How to Succeed: Tips for Wrist Health and Safety
Arm balances can be taxing on the joints. To maintain a long term practice, keep these points in mind.
Warm up your wrists: Spend at least 5 minutes doing wrist circles and stretches before attempting these variations.
Use a “Claw” grip: Do not let your palms go flat and “dead.” Grip the mat with your fingertips (Husta Bandha). This engages the forearm muscles and protects the carpal tunnel.
Use Props: If you are afraid of falling, place a bolster or a soft pillow in front of your face. This removes the psychological barrier of the “faceplant.”

Conclusion
Mastering these crow pose variations does not happen overnight. It is a journey of patience, consistency and a few tumbles along the way. Remember that yoga is not about the final “shape” but the awareness you build while trying to get there.
By incorporating these four variations into your routine, you will build a stronger core, more resilient shoulders and the mental focus to tackle any challenge on or off the mat.
Keep practicing, stay curious and do not forget to enjoy the view while you are flying.
(FAQs) About 4 Creative Crow Pose Variations: Take Your Bakasana to the Next Level
1. Why do my wrists hurt after practicing crow pose?
Wrist pain is usually due to a lack of warm up or placing too much weight on the heel of the hand. Try “clawing” the mat with your fingertips and ensuring your shoulders are properly warmed up.
2. How long should I be able to hold a standard crow before trying variations?
Ideally, you should be able to hold a steady, calm crow pose for at least 30 seconds without struggling for breath before moving into one legged or transition variations.
3. Is Crane Pose harder than Crow Pose?
Yes. Crane Pose requires significantly more upper body strength and core compression because you lose the “shelf” that bent elbows provide.
4. Can I practice these variations every day?
While you can practice daily, arm balances are intense. Listen to your body and give your wrists and shoulders a break if they feel “clicky” or fatigued.
5. I can not get my knees to stay on my arms, they keep sliding off, What should I do?
This is often due to the “shelf” being too small. Try wearing leggings (skin on skin can be slippery) and focus on squeezing your knees inward against your arms rather than just resting them on top.
6. What is the difference between Bakasana and Kakasana?
Kakasana (Crow) typically has bent arms, while Bakasana (Crane) features straight arms.
7. How can I overcome the fear of falling forward?
Place a pillow in front of you! Most of the “fear” is mental. Having a soft landing spot allows your brain to relax and focus on the balance.
8. Do I need a strong core for Side Crow?
Yes, Side Crow requires significant oblique strength to maintain the twist while lifting the hips.
9. Can beginners try these variations?
Beginners should focus on the basic crow pose first. Once you have the fundamental balance, Side Crow is usually the most accessible “next step.”
10. What are the best prep poses for these variations?
Plank, Chaturanga, Navasana (Boat Pose) and Malasana (Yogi Squat) are excellent for building the specific strength needed for these variations.