
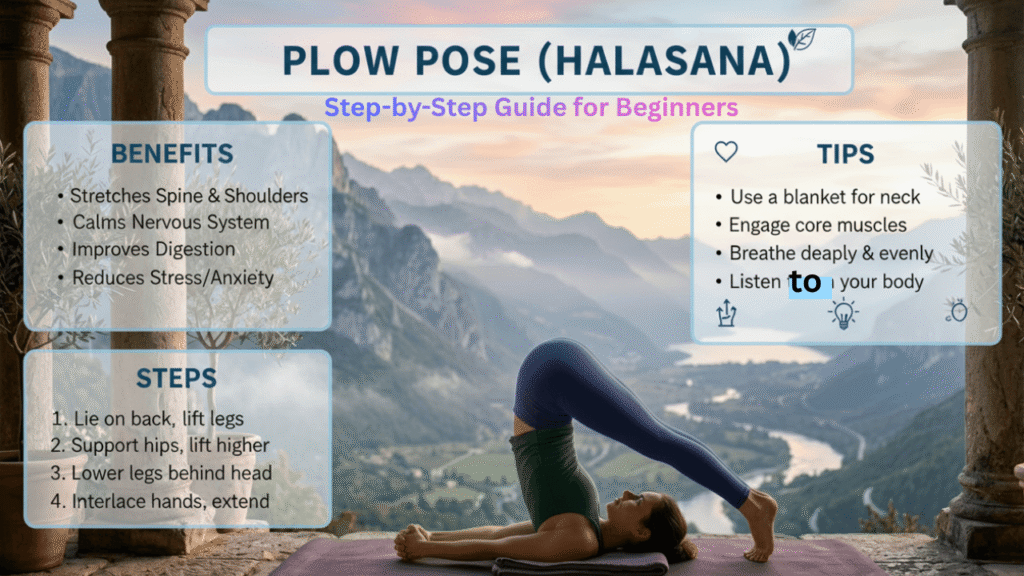
Learn how to master Plow Pose (Halasana) with our comprehensive step by step guide for beginners. Discover the essential alignment tips, health benefits and easy modifications to help you safely deepen your yoga practice today.
Table of Contents
Introduction
Yoga is a journey of discovery and few poses offer as many rewards for the spine and mind as the Plow Pose. Known traditionally as Halasana, in this pose, your body creates a shape that resembles a classic wooden plow used to turn the soil. Just as a plow prepares the soil for new growth, practicing this pose helps you stretch deeply and find a sense of true inner peace.
For many beginners, seeing someone fold their legs over their head might look a bit intense if you have never tried it before. However, with the right approach and proper alignment, Plow pose is actually quite easy for most people to try and is a wonderful way to deeply relax.
In this guide, we will break down the technique, safety tips and variations to help you master this pose at your own pace.
1. The Physical and Mental Benefits of Plow Pose
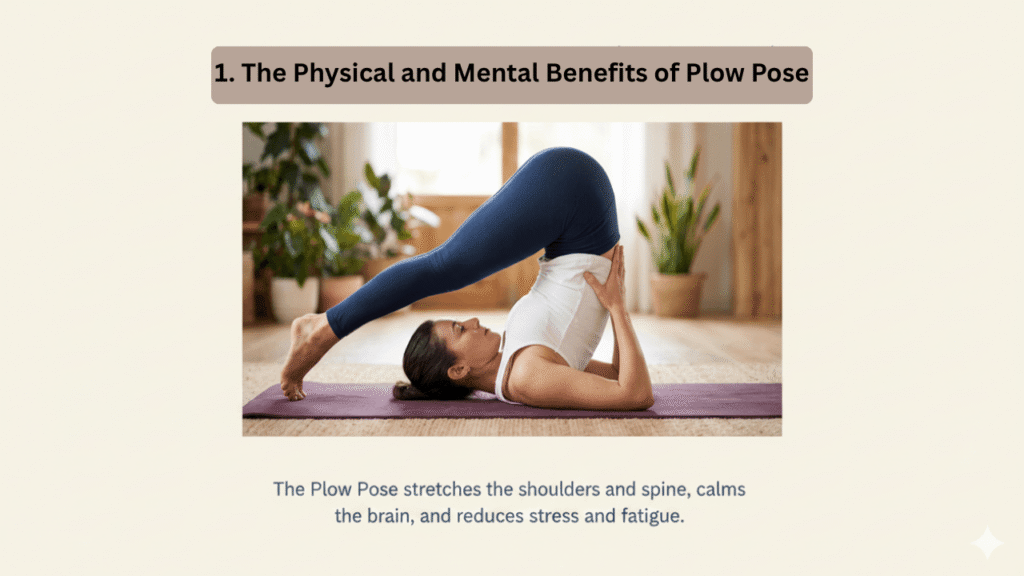
The Plow Pose is often called the “fountain of youth” for the spine. Because it involves a deep forward fold while inverted, it stretches the entire back of the body from your heels through the hamstrings, all the way up to the cervical spine.
Spinal Flexibility: If you do this regularly, it helps stretch out your back and keeps your spine feeling loose and healthy.
Digestive Aid: The gentle compression of the abdominal area massages the internal organs, aiding in digestion and metabolic health.
Calming the Nervous System: Inversions are known to trigger the parasympathetic nervous system, making the Plow Pose an excellent choice for reducing stress and anxiety before bed.
Thyroid Stimulation: The chin lock position (Jalandhara Bandha) naturally stimulates the thyroid and parathyroid glands, which help regulate metabolism.
2. Preparing Your Body: Essential Warm Ups
You should never jump straight into Plow Pose without preparing your muscles. Since this pose places significant pressure on the neck and shoulders, warming up is non negotiable.
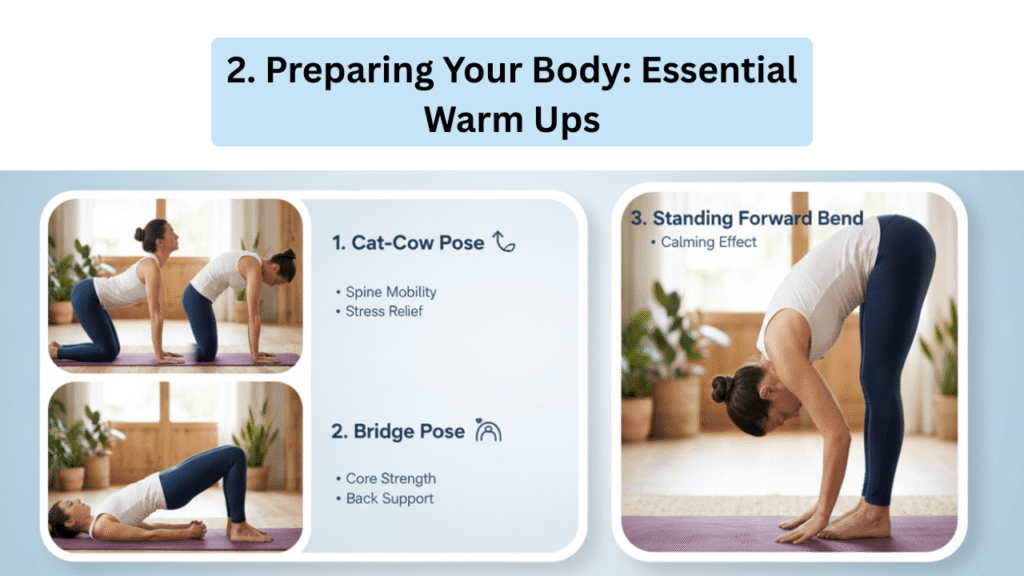
Before attempting the full expression, spend 5-10 minutes on these movements:
Cat-Cow Stretch: To loosen the spine and neck.
Bridge Pose: To open the chest and strengthen the legs.
Forward Folds: To lengthen the hamstrings, which is crucial for reaching your feet to the floor in Plow Pose.
Proper preparation ensures that when you enter the Plow Pose, your muscles are elastic enough to support the deep stretch without strain.
3. Step-by-Step Instructions for Beginners
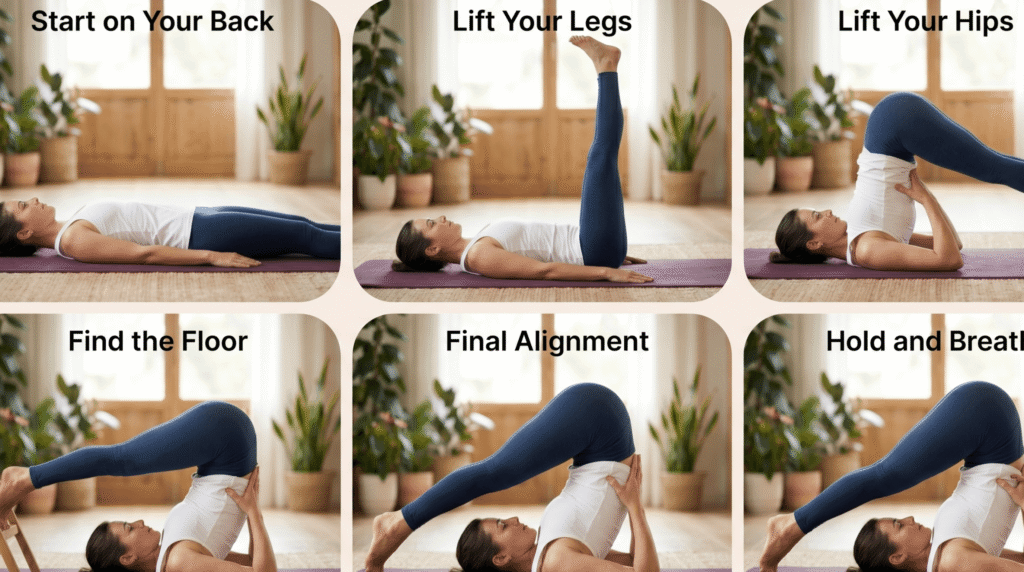
Follow these steps to enter the Plow Pose safely:
Start on Your Back: Lie flat on your mat with arms by your sides, palms facing down.
Lift Your Legs: On an inhale, use your core strength to lift your legs to a 90 degree angle.
Lift Your Hips: Using your hands for support on your lower back, lift your hips off the floor, bringing your legs back toward your head.
Find the Floor: Slowly lower your toes toward the floor behind your head. If they do not touch yet, do not worry, keep your hands on your back for support.
Final Alignment: Once your feet are stable, you can choose to keep your hands on your back or interlace them on the mat to deepen the shoulder stretch.
Hold and Breathe: Stay in the Plow Pose for 5 to 10 deep breaths, keeping your gaze fixed on your navel or chest. Never turn your head to the side in this position.
4. Common Mistakes and Safety Precautions
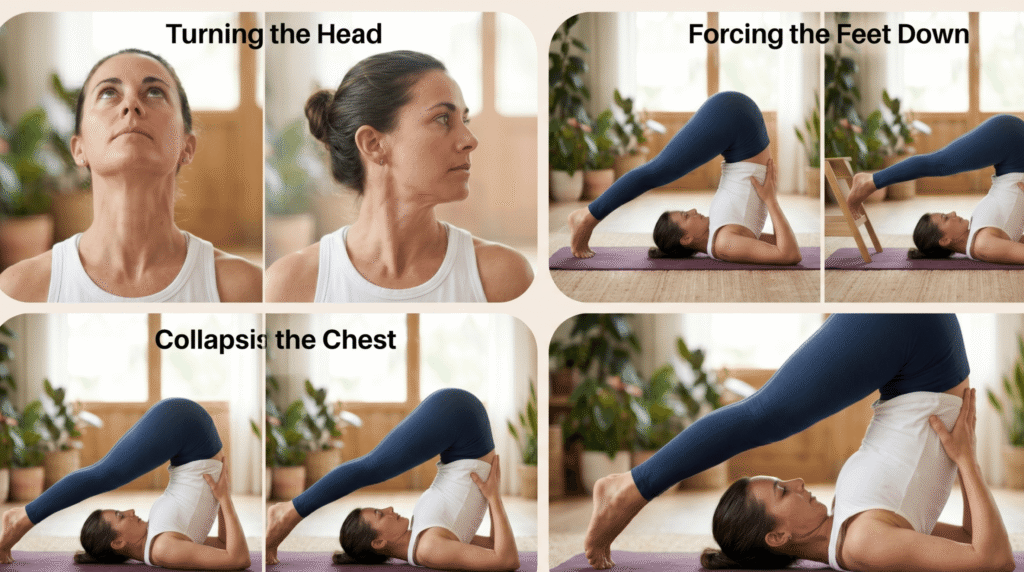
To ensure your practice remains beneficial, avoid these common pitfalls in Plow Pose:
Turning the Head: This is the most dangerous mistake. Turning your neck while it is under pressure can cause injury. Keep your gaze centered.
Forcing the Feet Down: If your hamstrings are tight, forcing your feet to the floor can strain your lower back. Use a block or a chair behind you to rest your feet on instead.
Collapsing the Chest: Keep your shoulders tucked in and lift your chest toward your chin so it is easy for you to breathe.
Overstretching: Listen to your body. If you feel any sharp pain in the neck or spine, exit the Plow Pose immediately.
5. Variations and Modifications for Every Level
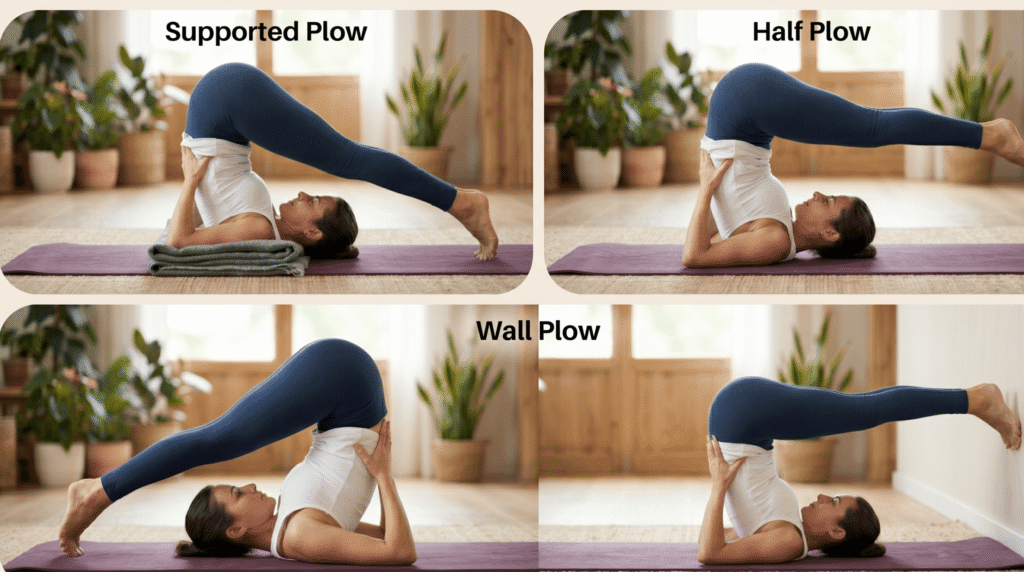
The best thing about yoga is that the pose should fit your body, rather than you trying to force your body into the pose. If the standard Plow Pose feels out of reach, try these modifications:
Supported Plow: Place a folded blanket under your shoulders (keeping your head on the mat) to protect the cervical spine.
Half Plow: Keep your legs parallel to the floor rather than reaching for the ground. This builds core strength without overstretching the back.
Wall Plow: Perform the pose with your back near a wall so your feet can rest against the wall for stability and support.
YOU TUBE (Bloom Fitness) Video in support of Plow Pose (Halasana)
Conclusion
Mastering the Plow Pose is a really exciting achievement for anyone practicing yoga. It teaches us the balance between effort and surrender the effort to lift and align the surrender to the deep stretch and the breath.
By practicing consistently and focusing on safety, you will soon feel the incredible release and calm that this pose offers. Remember, yoga is not about how far your feet can go, but how much you grow along the way.
(FAQs) About Master Plow Pose (Halasana): Step-by-Step Guide for Beginners
Is Plow Pose safe for beginners?
Yes, if practiced with care. Beginners should use props like blankets or blocks until they develop enough flexibility.
2. How long should I hold the pose?
Start with 30 seconds (about 5 breaths) and gradually work your way up to 2-3 minutes.
3. Why can not I touch my feet to the floor?
This usually indicates tight hamstrings or a stiff lower back. Consistent practice will improve this over time.
4. Should I do Plow Pose if I have neck pain?
If you have a chronic neck injury or severe pain, it is best to avoid this pose or consult a doctor first.
5. Can I practice this pose during my period?
Some traditions advise against deep inversions like Plow Pose during menstruation, while others say it is fine. Listen to your body’s energy levels.
6. What is the best counter pose for Halasana?
Fish Pose (Matsyasana) is the perfect counter pose as it opens the throat and chest in the opposite direction.
7. Is it okay if my knees bend?
Yes! Softening the knees can take the pressure off your lower back and hamstrings.
8. Does this pose help with insomnia?
Yes, many of us find that the calming effect on the nervous system helps them fall asleep more easily.
9. Should I tuck my chin?
Your chin will naturally move toward your chest, but avoid “forcing” it. Maintain space so you can breathe comfortably.
10. Can I use a chair for support?
Absolutely. Placing a chair behind your head to rest your feet on is a highly recommended modification for beginners.